It's bothered me that when people order something as simple as a hackysack ball or footbag, I can't get the shipping costs down.
Basically unless it's a flat package that fits thru a mail slot, Canada Post charges for a small packet. But 3 little bags filled with beans just can't compress into the slot.
What if I make them available as a Diy, include a yarn needle (that's still thin), and diy-ers can supply own beans?
(A bag of dry navy beans is pretty cheap. I'm seeing a 500g bag for 3.99 on Amazon.ca. But you can get them cheaper at local grocery store or bulk bin place.
Whereas the small packet rate for shipping goes up to just under $10, also dependent on weight.)
I've made a photo album that goes step by step thru finishing off the bag. Here's the link:
Here's a text guide to go with the album (photos in the album are numbered as captions):
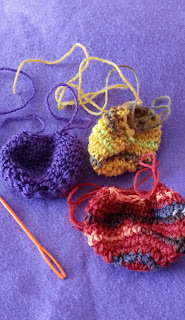
1. Contents of kit (3 shells + plastic yarn needle).
2. Shows completed ball for comparison with shells
3. Sample shell to be filled in these pics, bag of dried navy beans, yarn needle
4. Get a dedicated bag of beans for this. The hands go right in there
5. Grab a handful of beans. Make a tube with your hand. (I've tried funnels etc, but hand works best)
6. Video clip of how beans go in.
7. What bag looks like when full. You don't have to fill to the brim.
8. Thread up yarn needle with yarn end at opening of bag.
9. The loop is kept from slipping closed by a piece of invisible tape. Pick tape off. It doesn't leave the yarn sticky.
10. Tighten the loop down by pulling the long tail/needle end.
11. Stick needle thru loop to begin closing. DO NOT tie a knot here.
12. To gather the top for closing, stick yarn tip thru 1 edge of the stitch. (Each stitch around top looks like a V. So you're picking up the outer edge of each V.)
13. Grab about 3 stitches at a time and snug up. Then do in batches of 3 until all the way around. (If you do all at once, the yarn kind of grabs itself and snarls and doesn't give you as tight a closure when you're done gathering.)
14. Shows loose gather all the way around.
15. Tighten down all the way/full gather. Tie knot here.
16. Push needle with yarn still threaded down thru top of ball and out bottom end. Snip tight to bottom edge of shell. (It will get sucked up into the ball after snipping). Take care not to snip into the shell of your ball.
17. Done! Rest of pics show top and side view of finished ball. As well as with measuring tape for scale.
If you've stumbled onto this posting and would like to buy the kit, here's the link to it in my Etsy shop:
Diy hackysack kit - where to buy
*A few beans will escape and roll around. If you can do this on a blanket on the floor or on your lap, it's easier to contain them.
Enjoy!